Adobe adds Local Hue and Saturation controls
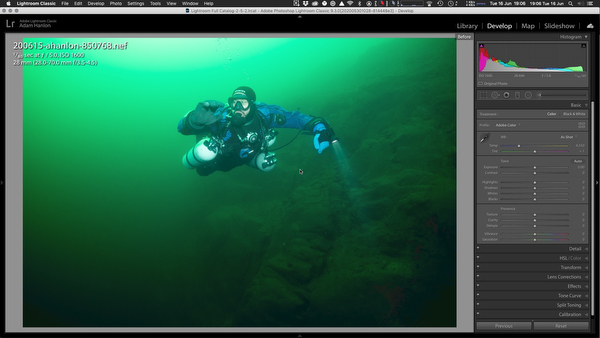
Today, Adobe has released significant updates to its Creative Cloud apps. Lightroom Classic 9.3, Lightroom 3.3, and Adobe Camera Raw version 12.3 all add new functionality and features. This includes the addition of local selective color and saturation adjustment. These allow for easier removal of color casts, which are often a feature of underwater images, due to the color of the water we actually shoot through.
Previously, if there was a local color cast, the only option was to attempt to use the White Balance Color and Hue sliders. In almost all instances, doing so resulted in a color casts elsewhere in the image.
To access the new selective Hue and Saturation tool, first add a selective adjustment using either Graduated Filter, Radial Filter, or Adjustment Brush tools. Remember, you can toggle a mask to view the area affected by the adjustment tool by tapping the o key.
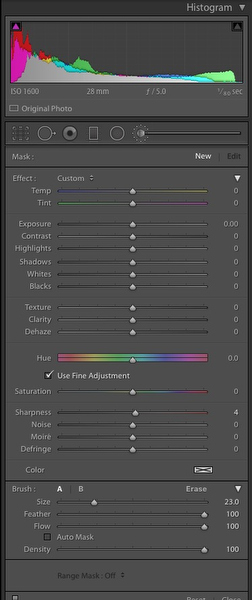
Once you have selected an area, this will open the option of using a Range Mask. This is located at the bottom of the panel. In the mask’s drop-down, select Color.
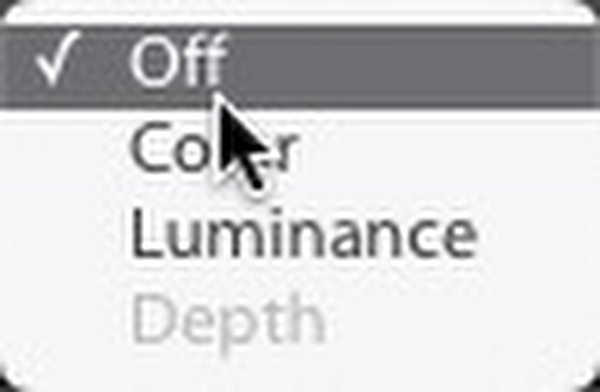
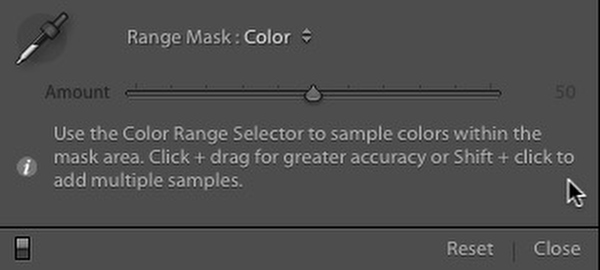
In turn, this enables an eyedropper tool. This can be used to select a specific color in the image. To add additional colors or tones, hold the Shift key while clicking on the image using the eyedropper. Again, if the mask is enabled (o key), it is easy to see which parts of the image will be affected by the new tool.

There are two additional sliders within the local adjustment panels on the latest versions of the apps. The first of these is labeled Hue. Moving the slider alters the hue, in quite a dramatic fashion with exaggerated movements! More subtle changes allow the gradual reduction of the predominately blue or green casts we see in underwater images. There is a tick box close to the slider that enables even finer hue adjustment.
Beneath Hue is a Saturation slider. This simply allows the application of additional or reduced saturation to the selected color. Again, this can help when we have undersaturated blues in the water column or overpowering emerald green of temperate waters.
Other updates in Lightroom Classic 9.3 include:
- Defaults - new additional presets are available to take the photo back to Adobe Default or to Camera Settings.
- ISO adaptive presets - you can now create presets for different ISO values without using a text editor.
- Video support - HEVC for Windows, AVI for Mac.
- Tone Curve update with new UI.
- Batch Exports - now include additional dialog for folders and naming when contained in the presets.
- Performance improvements.
- Sync status has been expanded - it’s now in the top right of Lightroom under a cloud symbol, similar to the Lightroom (cloud-based) system.
Lightroom (the cloud-based version) is now updated to version 3.3.
Changes include:
- Local Hue adjustment enables changing colors of an object.
- New Activity view and Notifications to show you comments and likes on your photos.
- Discovery Tutorials - you can now share your own photos and edits. Also, you can follow photographers you like.
- Text Watermarking - added to desktop and additional options on mobile, now syncs to all devices.
- Versions - you can now save your photo at different stages so you can compare results.
- Edit in Photoshop - direct integration between Lightroom and Photoshop on iPad.
- Defaults - set new default edit settings for all new imports.
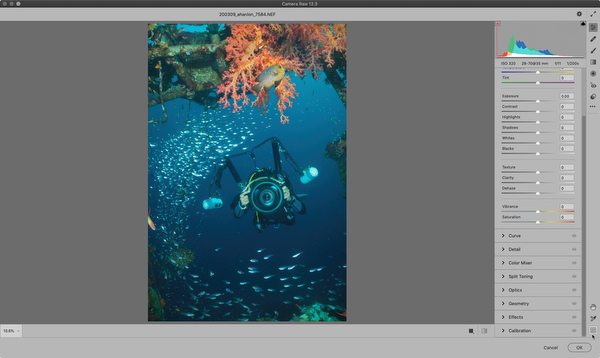
Camera Raw 12.3 features an improved interface:
- Easily navigate through and access edit, local adjustment, crop, spot removal, and other tools from the highly organized panels in the right.
- Tools such as Adjustment Brush, Graduated Filter, and Radial Filter (local adjustment tools) are present in the right panel.
- The Transform panel is renamed to Geometry.
- The improved Curve panel allows you to switch between Parametric and Point Curve channels. You can make precise adjustments with input values for the point curve and the red, green, and blue channels.
- The enhanced User Interface in Adobe Camera Raw
- Easily access tools in the right side of the screen
- The options to merge Panorama and HDR photos are now available in the context menu.
- You can now choose to have the filmstrip in the left panel (recommended for portraits) or the bottom panel (recommended for landscapes).
- The default keyboard shortcuts starting from Adobe Camera Raw version 12.3 are updated.
- Easily create a custom preset that adapts to different ISO values. You can then set this preset as the default setting for raw photos in Preferences > Raw Defaults.
- Access the Hue slider in the Adjustment Brush, Graduated Filter, and Radial Filter panels.
- You now have an option to use a 2x2 grid overlay while cropping a photo. This centered crop overlay guides you to precisely crop the center of the picture.