Review: Marelux Sony a1 Housing by Phil Rudin
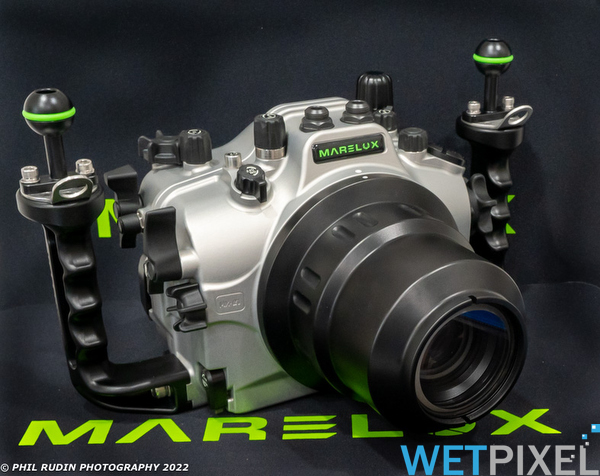
Marelux MX-A1 Housing for Sony A1
Text and Photos by Phil Rudin
We tend to see new aluminum housing manufacturers enter the rather small underwater housing market about once in a decade. In fact, the last one I can remember was Nauticam and they have made a huge impact on the market. I have noticed in my over fifty-plus years of underwater photography that the companies that succeed in the underwater market are run by hard-core divers and underwater photographers as they have insight into what truly matters to photographers.
Marelux is a global brand with products being manufactured in China. It is owned by several hard-core professional underwater photographers and engineers. Marelux has assessed the market trends in the 2020s and has chosen to concentrate on housings for mirrorless cameras from Canon, Nikon, and Sony only.
The company also has two high-end video camera housings in the pipeline for Sony FX3 and Alexa Mini LF and Mini along with housings for monitors and recorders. All Marelux housings are depth rated to 100 meters, offer manual flash triggers and use the same size dome ports and extension systems so that you can move between camera brands without needing to change port systems. Macro ports will vary depending on the length of the lens.
Currently, Marelux has housings available for the Canon EOS R5 and R6 cameras, Nikon Z6 II and Z7 II cameras, and Sony A7R III, A7R IV, A7s III, A7 IV, along with the A1 which is the focus of this review. Marelux offers six standard housing colors: Standard Black, Burgundy, Mocha, Oliver Green, Silver Gray, Yale Blue, and all of the current mirrorless housings are available in all six colors.
Sony Alpha A1 Camera
Sony Imaging introduced its first true flagship camera, the 50.1 megapixels Sony A1 full frame mirrorless camera in late January 2021. During the past year, this camera has received a 93% score by DPReview and Backscatter has ranked the Sony A1 as the best all-around full frame advanced mirrorless camera for 2022. (Editor’s note: Presumably thus far in 2022!)
I reviewed the Sony A1 in uwpmag.com issue #120 which can be found in the back issues so I will limit the camera section to a short spec list.
- 50MP ‘stacked’ full-frame CMOS sensor.
- 30 fps burst shooting with electronic shutter (lossy compressed Raw/JPEG only) 10 FPS mechanical shutter Raw.
- 8K/30p video recording with Log and 4K Raw video out over HDMI.
- 1/400s flash sync with a mechanical shutter, 1/500s in 21MP APS-C mode (1/200s with electronic shutter)
- 9.44M-dot OLED electronic viewfinder with 0.9x magnification
- 3.0” tilting touchscreen with 1.44M-dot resolution
- Full-size HDMI port, headphone/mic ports, USB-C port with 10 Gb/s transfer speeds, ethernet port, dual card slots for UHS-II or CFexpress Type-A.
- CIPA rated to 530 shots with rear LCD (430 through the viewfinder).
- Weather-sealed body.
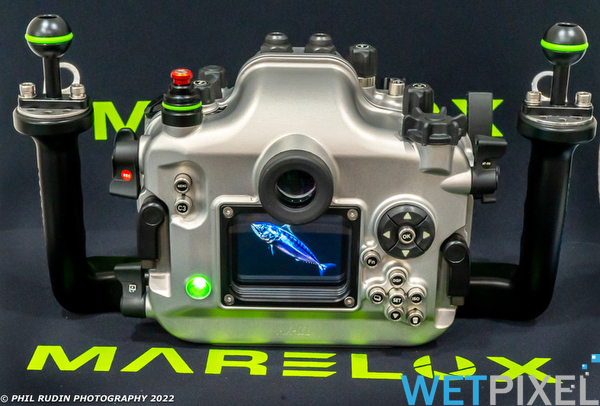
Marelux MX-A1 Housing and Ports
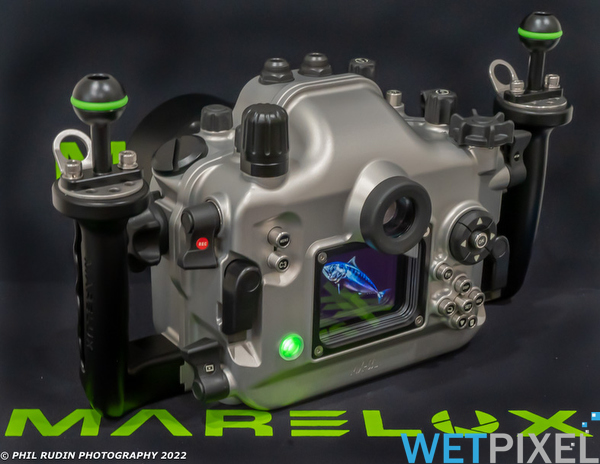
The MX-A1 housing is priced at $3198.00 US for the Basic Black with a $200.00 upgrade for other colors. My prototype MX-A1 test housing was supplied with the very attractive non-reflective Silver Gray finish which seems quite durable. When I opened the housing for the first time I was surprised to see a bright lime green main housing O-ring. At first, I thought this was a bold fashion statement, not the norm for underwater housings but in the field, I realized that debris and hair popped on the lime green making the O-ring easier to service and keep clean. The lime O-rings are also carried over to the ball heads on the grips and the logo as well.
The grips are very solid and held in place by a single large Allen bolt which also allows the grips to be removed easily for transport. The grips include standard ball head mounts for strobe and video support arms as well as other accessories. You can also add spacers to the grips for large hands and heavy gloves. Because the housing is small and has several controls on top there is no room for extra accessory ball heads to be mounted. Marelux instead offers twin Y-ball heads and an accessory mounting handle which has room for several additional mounting balls over the top of the housing.
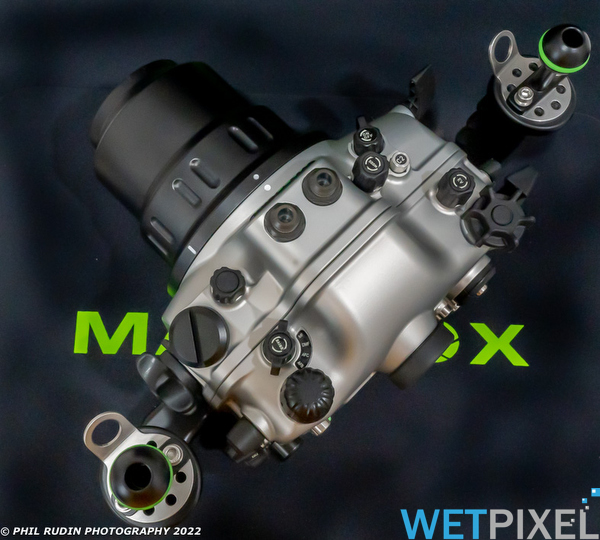
The housing features M16 & M24 bulkheads. The M16 is on the rear housing plate is designed for a vacuum valve. The M24 bulkhead is added to the front of the housing for HDMI 2.0 output connectivity.
The optional vacuum valve is easy to install and remove with a simple tool and uses a standard vacuum pump that fits over the red valve once the waterproof cap is removed. The M16 valve and pump are sold separately for $166.00. The vacuum electronics come installed in the housing and work as both a moisture detector and as a vacuum detector. A red button on the inside rear half of the housing is pressed to activate the vacuum system. A yellow blinking light starts flashing on the rear housing plate and the housing plate is then sealed to the front section of the housing. The vacuum is them drawn and when the flashing light turns solid green and the waterproof cap is reinstalled the housing is ready to go into the water. To release the vacuum the waterproof cap is removed and the red valve is pulled up. Once the light turns red the vacuum is fully released.
I average over 100 dives a year and I routinely change the alarm system battery each year. I also recommend carrying spare batteries for all of your needs when traveling just to be on the safe side.
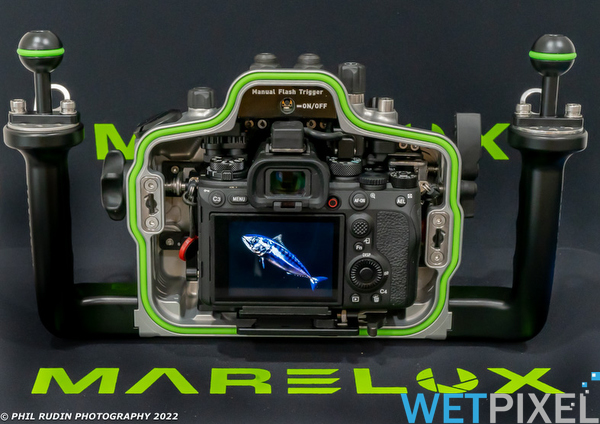
The MX-A1 housing has a twin locking system to secure the front half of the housing to the rear. To unlock, push in the two buttons on the bottom of the locking levers and turn the levers up until they stop. To lock the housing reverse the process once the rear half of the housing is in place against the rear O-ring. The housing has corresponding levels, pushbuttons, and control dials for every function on the camera body. These controls are well placed and should be easy to use even with gloves. The rear half of the housing has a large LCD window and an optical glass pickup finder for the outstanding Sony A1 EVF. The housing pickup finder can also be removed from the rear of the housing with a simple tool.
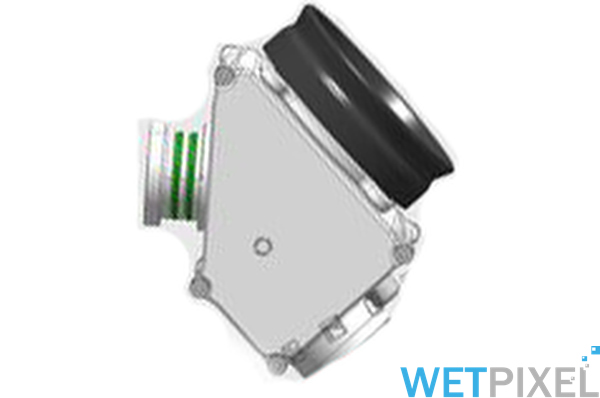
Marelux is currently developing a 45° optical viewfinder for those who are seeking better critical focus and composition. Marelux plans to include a depth gauge powered by a small CR2 battery in the viewfinder which will be useful for those of us trying to maintain a frame of reference while blackwater diving. The new viewfinder is expected in late April.
The port locking lever is on the front lefthand side of the housing and the lens release button is on the right viewed from the front of the housing. This allows you to remove the port or port adapter and install or remove a lens without removing the camera or even opening the housing, although the back door needs to be removed in order to reestablish a vacuum if required. This is a very useful feature because the port opening is too small to accept larger lenses like the Sony FE 12-24mm F/2.8 GM zoom and these must be mounted from the front of the housing, with the camera installed. The ports and port extensions use the bayonet locking system and all have an additional locking device for extra security. The ports and extensions seal use a single lime green O-ring. Marelux also includes five-inch rubber caps for the housing body, port extensions, and ports that stay very secure once mounted. Marelux offers a Nauticam to Marelux extension ring 20 and Sea & Sea to Marelux extension ring 20 so that S&S ports and Nauticam N120 ports and extensions can be moved between housings. The Nauticam extension ring also accepts the WACP-1 wet lenses. The port rings do not support the Canon EF 11-24mm F/4 lens. Both extensions rings retail for $200.00.
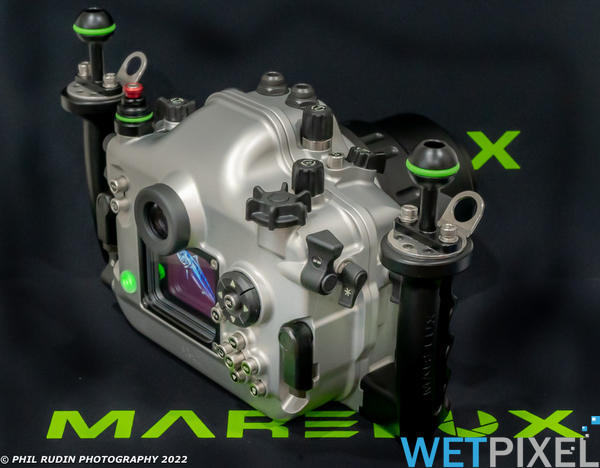
The top of the housing features two threaded fiber optic ports supplied with protective caps for optical sync cords. I used the optical cords that push into the ports with the 90 degree ends. These ports work very well and at no time did I have a cord fall out of the port. I tried the screw-on caps from Sea & Sea and Nauticam but they would not fit onto the slightly larger optical ports threads. Marelux intends to market cords of their own design so the screw-on type may be coming soon.
Compatible strobes can be triggered using the optional Marelux manual flash trigger for Sony Alpha-series cameras. The Marelux fiber optic flash trigger is compatible with many flashes including Inon Z-330/type II, Z-240 Type 4, S-2000, D-2000 Type 4, Backscatter MF-1, Sea & Sea, Retra, and many other fiber optic flashes. It triggers in manual mode only and does not have a TTL function. The flash trigger is mounted over the camera hot shoe and uses two batteries that provide thousands of flashes. The two batteries can be easily replaced using the supplied Allen tool.
Simply plug the hot shoe into the camera, test, and you are ready to go. The trigger only turns on when the camera is turned on and automatically shuts off, conserving battery power when the camera is turned off. The Marelux flash trigger has excellent recycles times allowing you to shoot between six and ten frames a second if your external strobes recycle times can keep up.
The Sony/Nikon manual flash trigger lists $198.00 as an accessory. UWTechnics has recently introduced TTL-converters for Marelux Canon and Sony housings. These will trigger a variety of strobe models and sell for $460.00. UWTechnics TTL converters allow high-speed synchronization with Retra Pro flashes at speeds up to 1/8000s.
The Sony A1 with a mechanical shutter will sync up to 1/400s in full frame and up to 1/500s in APS-C mode. In my previous Sony A1 article in UWP #120, I stated that a proprietary TTL flash trigger was required to access sync speeds above 1/250 sec. Since that article Jim Decker from Backscatter has found that if you go deep into the camera menu, there is a setting under “flash” called “flash Sync Spd. Prty” that over rides the auto setting from the factory and allows the 1/400 or 1/500 (in APS-C mode) flash sync with any flash trigger manual or TTL. Thanks, Jim for that useful update. The A1 will also sync up to 1/200s using electronic shutter.
For video users, Marelux has made the camera tray and tray mount from metal rather than plastic to help disperse heat helping to mitigate the overheating issues associated with shooting in 8K and 4K/60 for extended periods of time. When you secure the tray the camera is centered in the dome and held very securely in place. Marelux also offers a Sony A7S III camera conversion kit for $248.00. This offers the option of using the housing with both cameras. Lastly, Marelux offers an SDI housing for the Atoms Shinobi 5 inch HDR monitor at $2088.00.
All Marelux ports and port extensions are compatible with current Canon, Nikon, and Sony mirrorless camera housings. Dome ports use high-quality coated optical glass and are sold in 140mm (not yet listed), 180mm ($1366.00), and 230mm ($2276.00) sizes. The ports come with a rubber body cap, a neoprene cover that has a velcro faster on the top side, a rigid zipper case for transport, a microfiber cleaning cloth and a spare O-ring. The aluminum mount on the inside of the 230mm dome port has beveled rings 360° around the inside port opening. This helps to reduce light reflection back onto the port glass which will cause ghosting and flare in the camera lens, especially in clear shallow water.
Field Testing the Marelux MX-A1 System
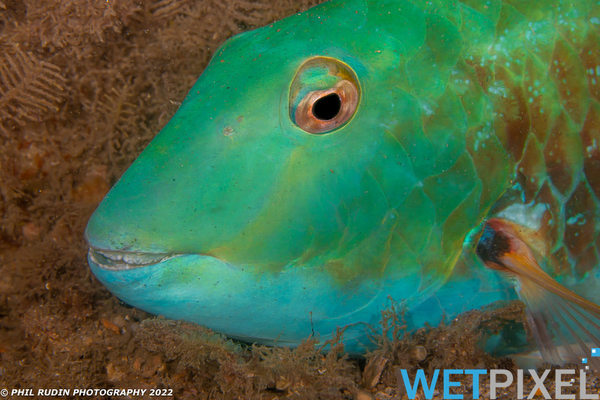
For this review, I selected the Sony FE 90mm F/2.8 G OSS macro lens which easily handles the A1’s large 50MP files and has great image quality. The 90mm macro was paired with the Marelux macro port 97 with 67 mm threads. The threads allow you to add a flip adapter and closeup lenses for macro beyond life-size. I also tested the Sony FE 12-24mm F/2.8 GM with the Marelux 230mm fisheye port II, 51103 zoom gear, and extension ring 70 with lock. I also used the 230mm fisheye port II, zoom gear 60201, and extension ring 40 with lock for the Canon 8-15mm F/4L fisheye zoom with Sigma MC-11 lens adapter. The 230mm port has two port blades each held in place by five Allen screws. These blades need to be removed to shoot at the 8mm end of the fisheye lens or you will get vignetting in the corners of the images. I used two Inon Z-330 Type II flashes for the wide lenses and two Backscatter MF-1 flashes for the macro images in this review.
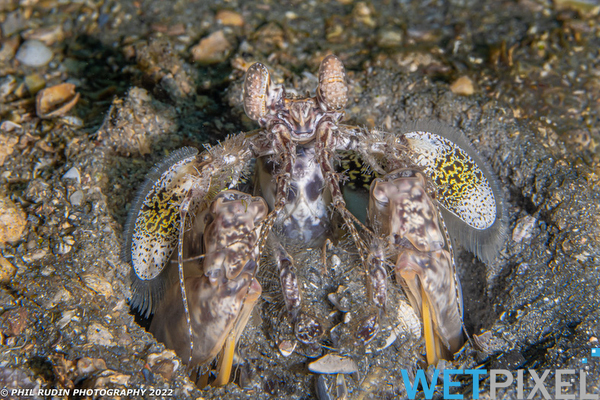
I configured the 90mm macro lens with the focus limiter set from 1:1 to infinity in autofocus. With previous Sony A7 cameras, I found that I had to use the focus limiter as it was prone to hunting and was slow got focus. With the A1 set to AF-C and tracking flexible spot mode the camera does not hunt as much as it did with previous Sony cameras and I no longer needed to limit focus range in order to easily autofocus on macro subjects.
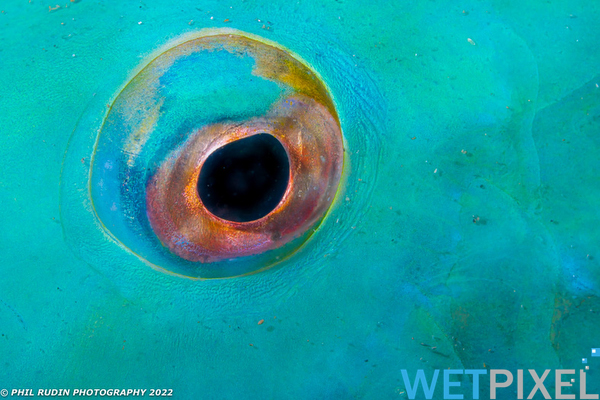
I have also moved away from using a manual focus gear even for magnification greater than life-size using a closeup lens. The Sony autofocus has become so good that I just don’t need the gear anymore. Marelux does offer a focus gear for the 90mm macro and other macro lenses but I did not test it for this review. I used the Backscatter and Inon Z-330 flashes with two 50 mm X 250 mm float arms and two 200 mm double ball arms. The float arms could have been eliminated with both setups and replaced by a second set of double ball arms.
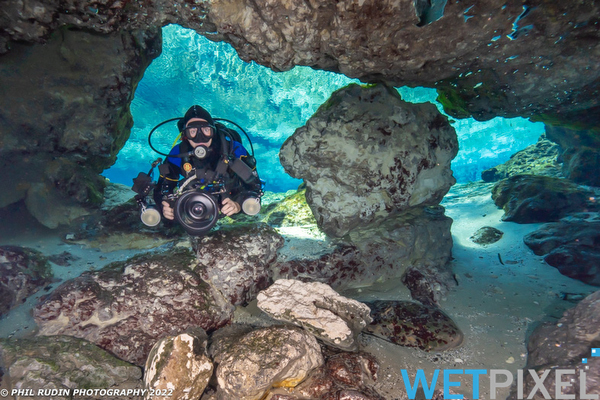
For those of you thinking about moving from a sub-full frame system to the A1 full frame system the reduced depth of field at any given F/stop over the smaller sensor cameras can present a few issues. High-resolution cameras, including the A1 and especially the A7R IV, highlight optical flaws associated with some lenses, and with some lens/port combinations, so chose carefully when making lens purchases. As I have mentioned in other reviews of full frame cameras with wide lenses, it is important to maintain smaller apertures to have decent corner sharpness. Water contact optics help with the corner sharpness issues at larger apertures and the Marelux to Nauticam 20 extension will allow you to mount water contact optics like the Nauticam WACP-1. I am informed that Marelux has a flat port and zoom gear for the Sony FE 28-60mm in development as well, so it is possible that the Nauticam WWL-1B may be an option in the future.
In the water, the MX-A1 housing is very well balanced and easy to use. All of the frequently used controls fall easily at your fingertips and after a few dives, I did not find myself having to look away from the viewfinder to change any of my camera settings. For a new housing company just entering the market I was impressed with the MX-A1 housing’s robust design.
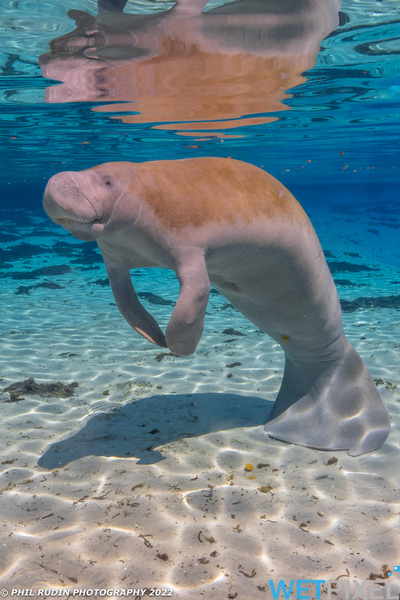
Keeping in mind that my test housing was a prototype I had the following issues with the controls. The rather complicated stacked Sony A1 double wheel for the frame rate and AF selection requires that a vertical button on top of the frame rate dial be pushed down to change frame rates from single to higher speeds and bulb. I could move between some of the settings but not all on my test housing. The lower AF select dial requires you to push in a button on the side of the dial and then move between MF, DMF, AF-C, and AF-S selections. The description included with my test housing indicates that the control lever is set to the AF-C position on the housing and on the camera before it is placed into the housing. With the review housing these controls did not lineup so could not be used properly.
The second issue was with the UP arrow on the four-way arrow display. When reviewing images you can push the AF-ON (also used for back button focus) lever and the image will enlarge and the point of AF will be centered in the frame. You can then use the four arrows to move the enlarged image around the frame to check corner sharpness or other concerns. Three of the arrows worked flawlessly but the up arrow would sometimes send the image back to full frame as if you had pushed the OK button. This was completely random so sometimes it worked and other times it would go back to the full image. These are quality control issues that need to be addressed by Marelux before the housings are ready for shipping to retailers. I was able to work around the first issues by making changes with other control buttons or in the menu. I would add that these issues have been corrected on a finished version of the Sony A7 IV housing I had access to.
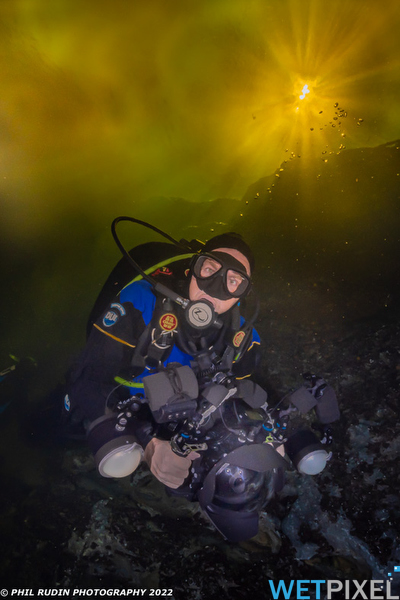
If the Marelux MX-A1 housing is within your budget and you are seeking housing for the Sony a1, this system may be for you.
Thanks to Marelux and its staff for assistance with the equipment used for this review. Go to marelux.co for further info and current pricing in your area. Please be aware the website is still being rolled out so return often.
About the Author
Phil Rudin is Senior Reviewer for Underwater Photography Magazine (uwpmag.com) having contributed over 100+ articles on new photo equipment, photography techniques, and dive travel. Phil’s images have appeared in a variety of magazines including Popular Science, Sport Diver, World’s Best Diving, Reflections, Scuba Diving, Underwater Journal, Skin Diver, Florida Underwater, South Florida Adventures, MexicanDiver.com, and many more. Phil has conducted underwater photography workshops for Reef Photo & Video, Underwater Digital Fiesta, Digital Jam, Hasselblad Xcursion, SFUPS, Dive Into Photography, and more. Phil is a Platinum Pro 5000 Diver who also lectures on travel destinations and photography around the world.
FTTC Disclosure:
The Marelux housing used for the review was loaned to the reviewer.